
Before we get into the basic functionality of OpenSCAD in the next chapter, let’s first get an overview of the program’s user interface and some of its standard functions and settings.
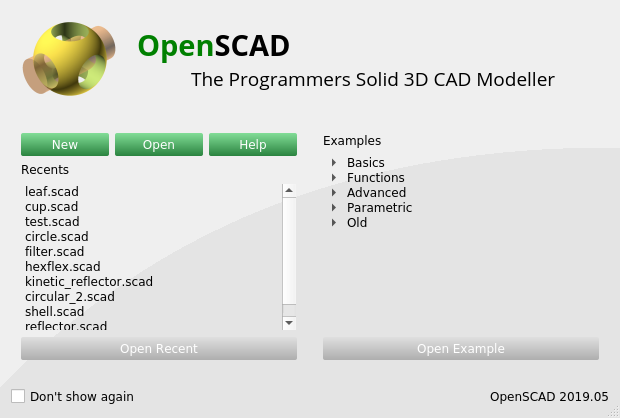
After starting OpenSCAD, you are greeted by a small startup window (Figure 1.). The button New starts the program with an empty, not yet saved file. The Open button takes you to a file selection dialog where you can select and load an existing file. OpenSCAD files end with the file extension .scad. These are simple text files. The button Help opens an internet browser with the online help of the program. Below these three buttons there are two lists. The list on the left shows files recently edited with OpenSCAD. If you select one of these files, the Open Recent button below the list becomes active and clicking on this button will then open the corresponding file. Beware: you might be tempted to click the Open button above the list after selecting a file. This will not work as expected and will lead you back to the file selection dialog. The list on the right offers a number of thematically grouped examples. A small triangle is displayed in front of each topic. Clicking on the triangle “unfolds” the topic and you can select one of the example files. This activates the button Open Example below the list, with which one can open the selected example. Alternatively, in both lists you can open a selected file by double-clicking it. If you do not want to be greeted by this startup window every time you start OpenSCAD, you can disable it by checking the Don’t show again checkbox at the bottom left.
For now, let’s start OpenSCAD with a new, empty file (New button) and take a look at the program’s user interface.
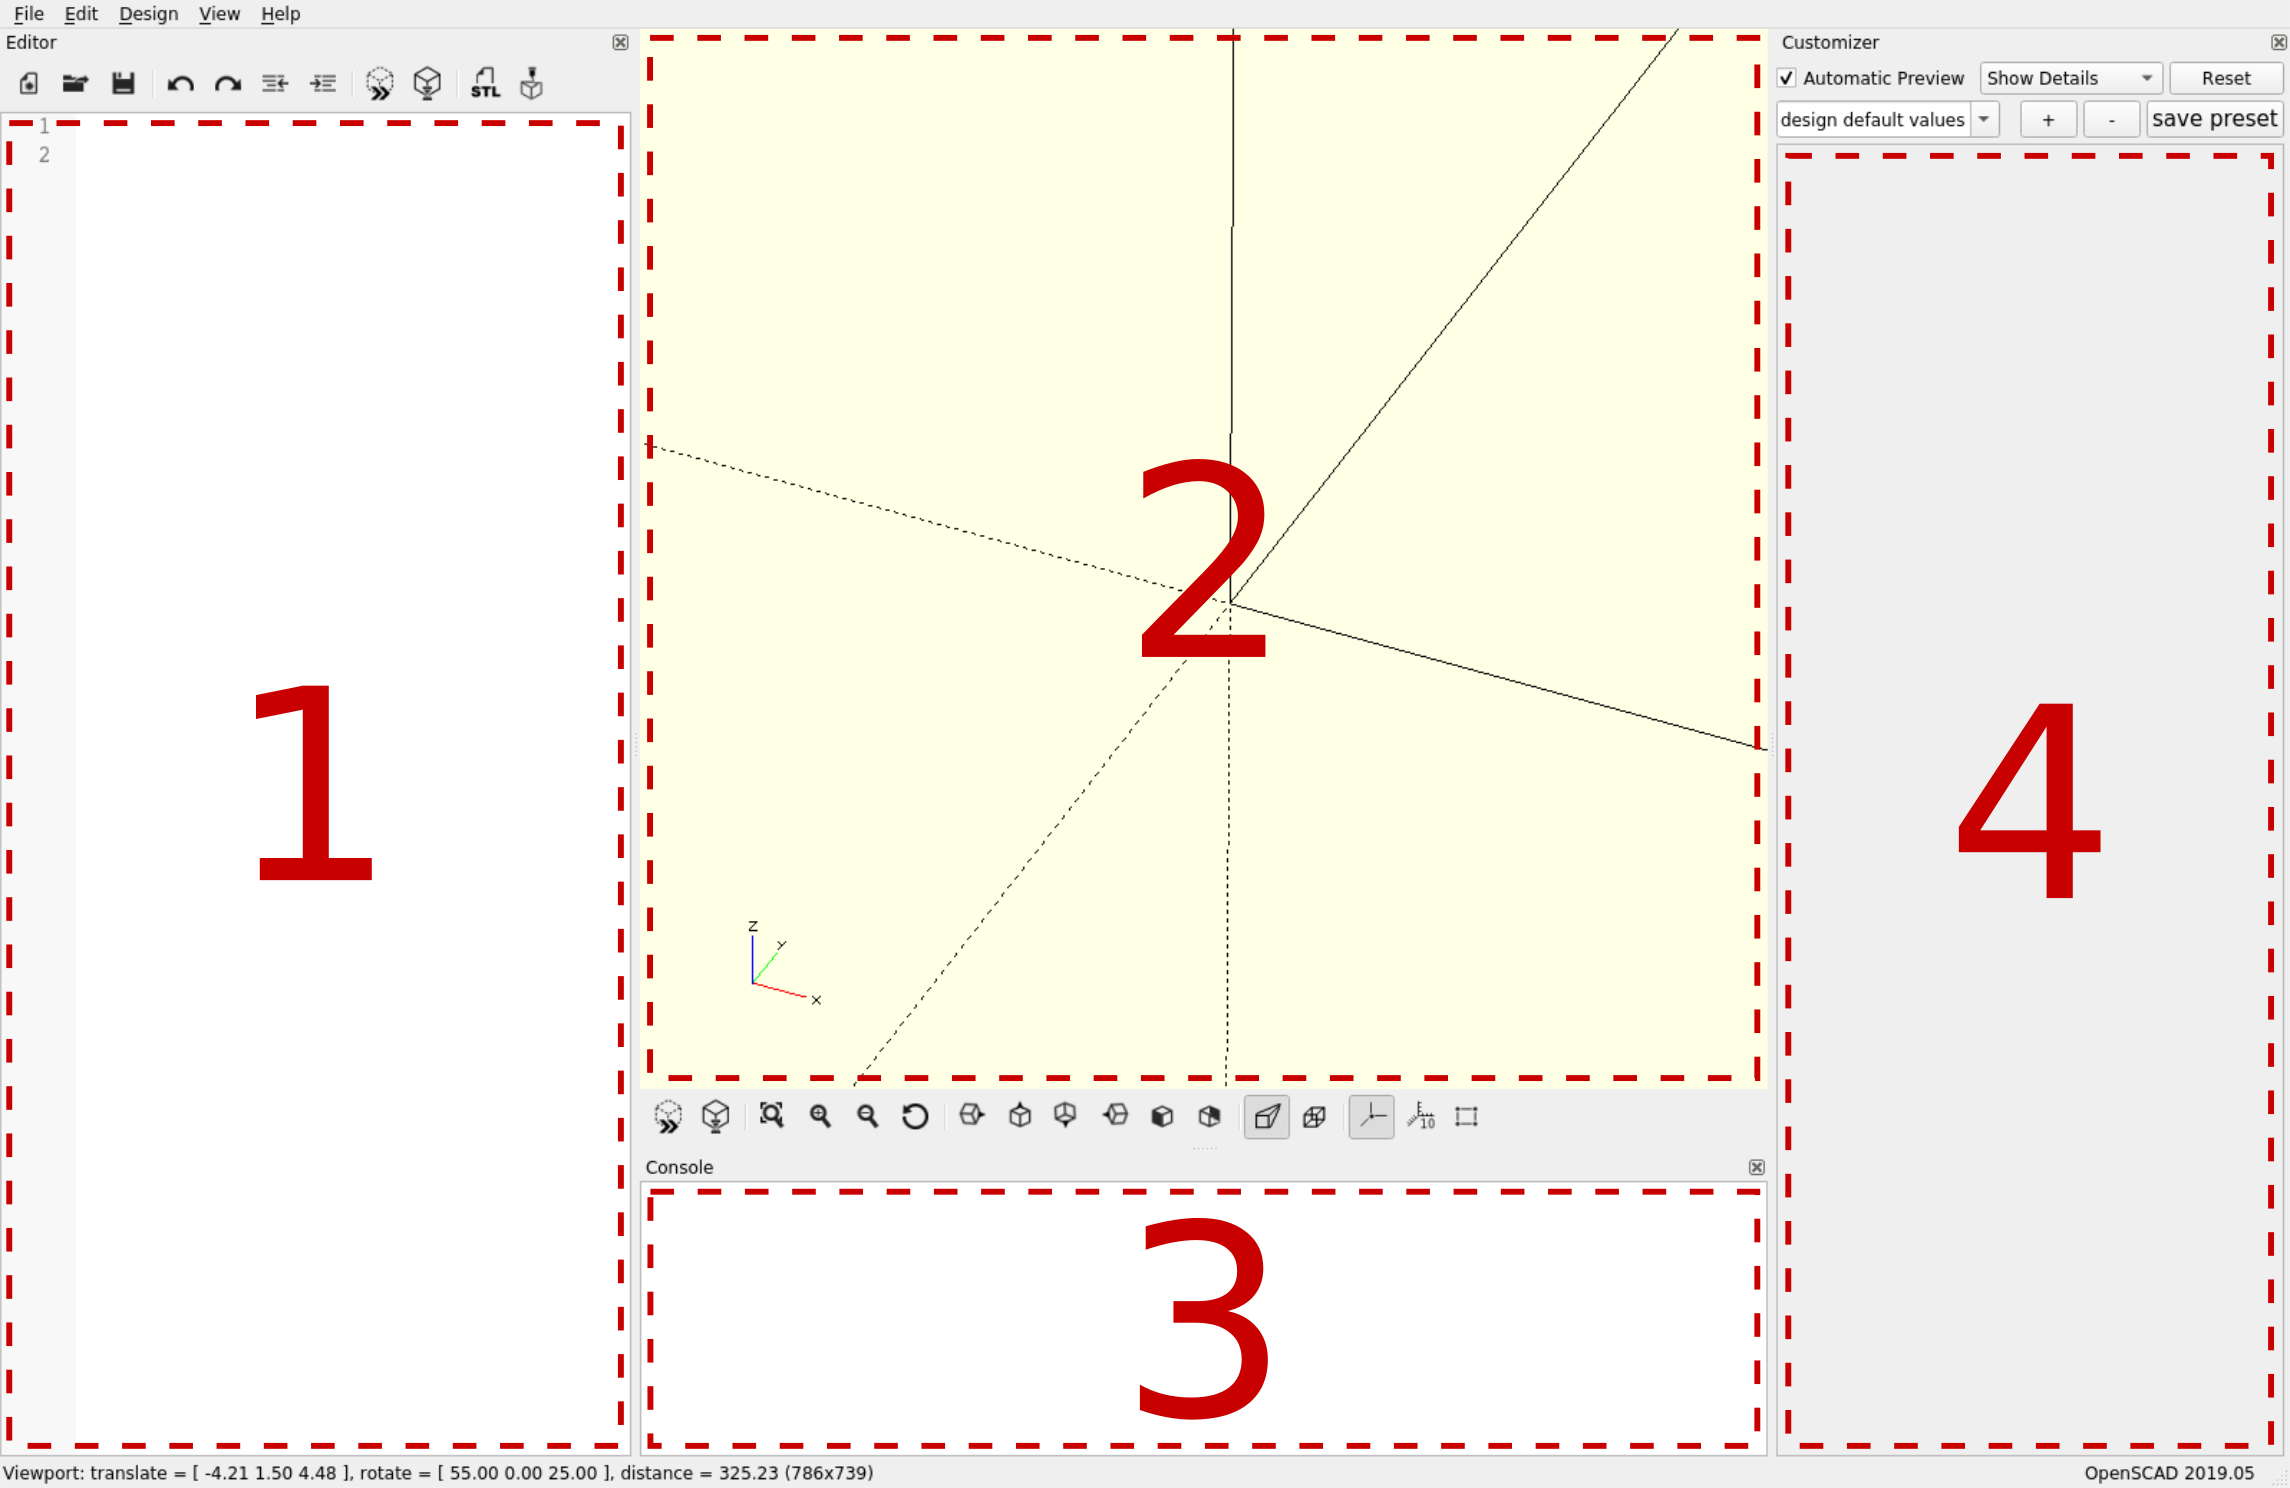
The user interface (Figure 1.) is divided into four areas. The first area is located on the left side. This is a simple text editor, which is the main input interface for OpenSCAD. All modeling of geometries takes place here.
The second area is located in the center of the program window. This is an output window that provides a three-dimensional representation of the described geometries. The view can be changed by clicking and dragging with the mouse. If the left mouse button is held down, the display can be rotated. If the right mouse button is held down, the view is shifted. The mouse wheel can be used to zoom in and out of the view. Further adjustments of the display are available via the toolbar below the output window as well as via the menu item View in the program menu (top left). We will explore the exact details of these functions later during the sample projects.
The third area contains the console output of the program. It is located below the 3D output window. Here textual feedback of the program appears after or during certain actions are executed. The feedback helps, for example, to find errors in the geometry description or to recognize whether a calculation has been completed.
The fourth area is located on the right side of the program window. It is the Customizer. As the name suggests, this program area is used to configure or adapt the current model. OpenSCAD interprets certain global variables of the model as parameters and automatically generates a corresponding graphical user interface for them in which the parameters can be set. The resulting set of parameters can then be saved as a preset and reloaded at a later time. Experience shows that this window is only used for very specific applications. It is therefore only used occasionally.
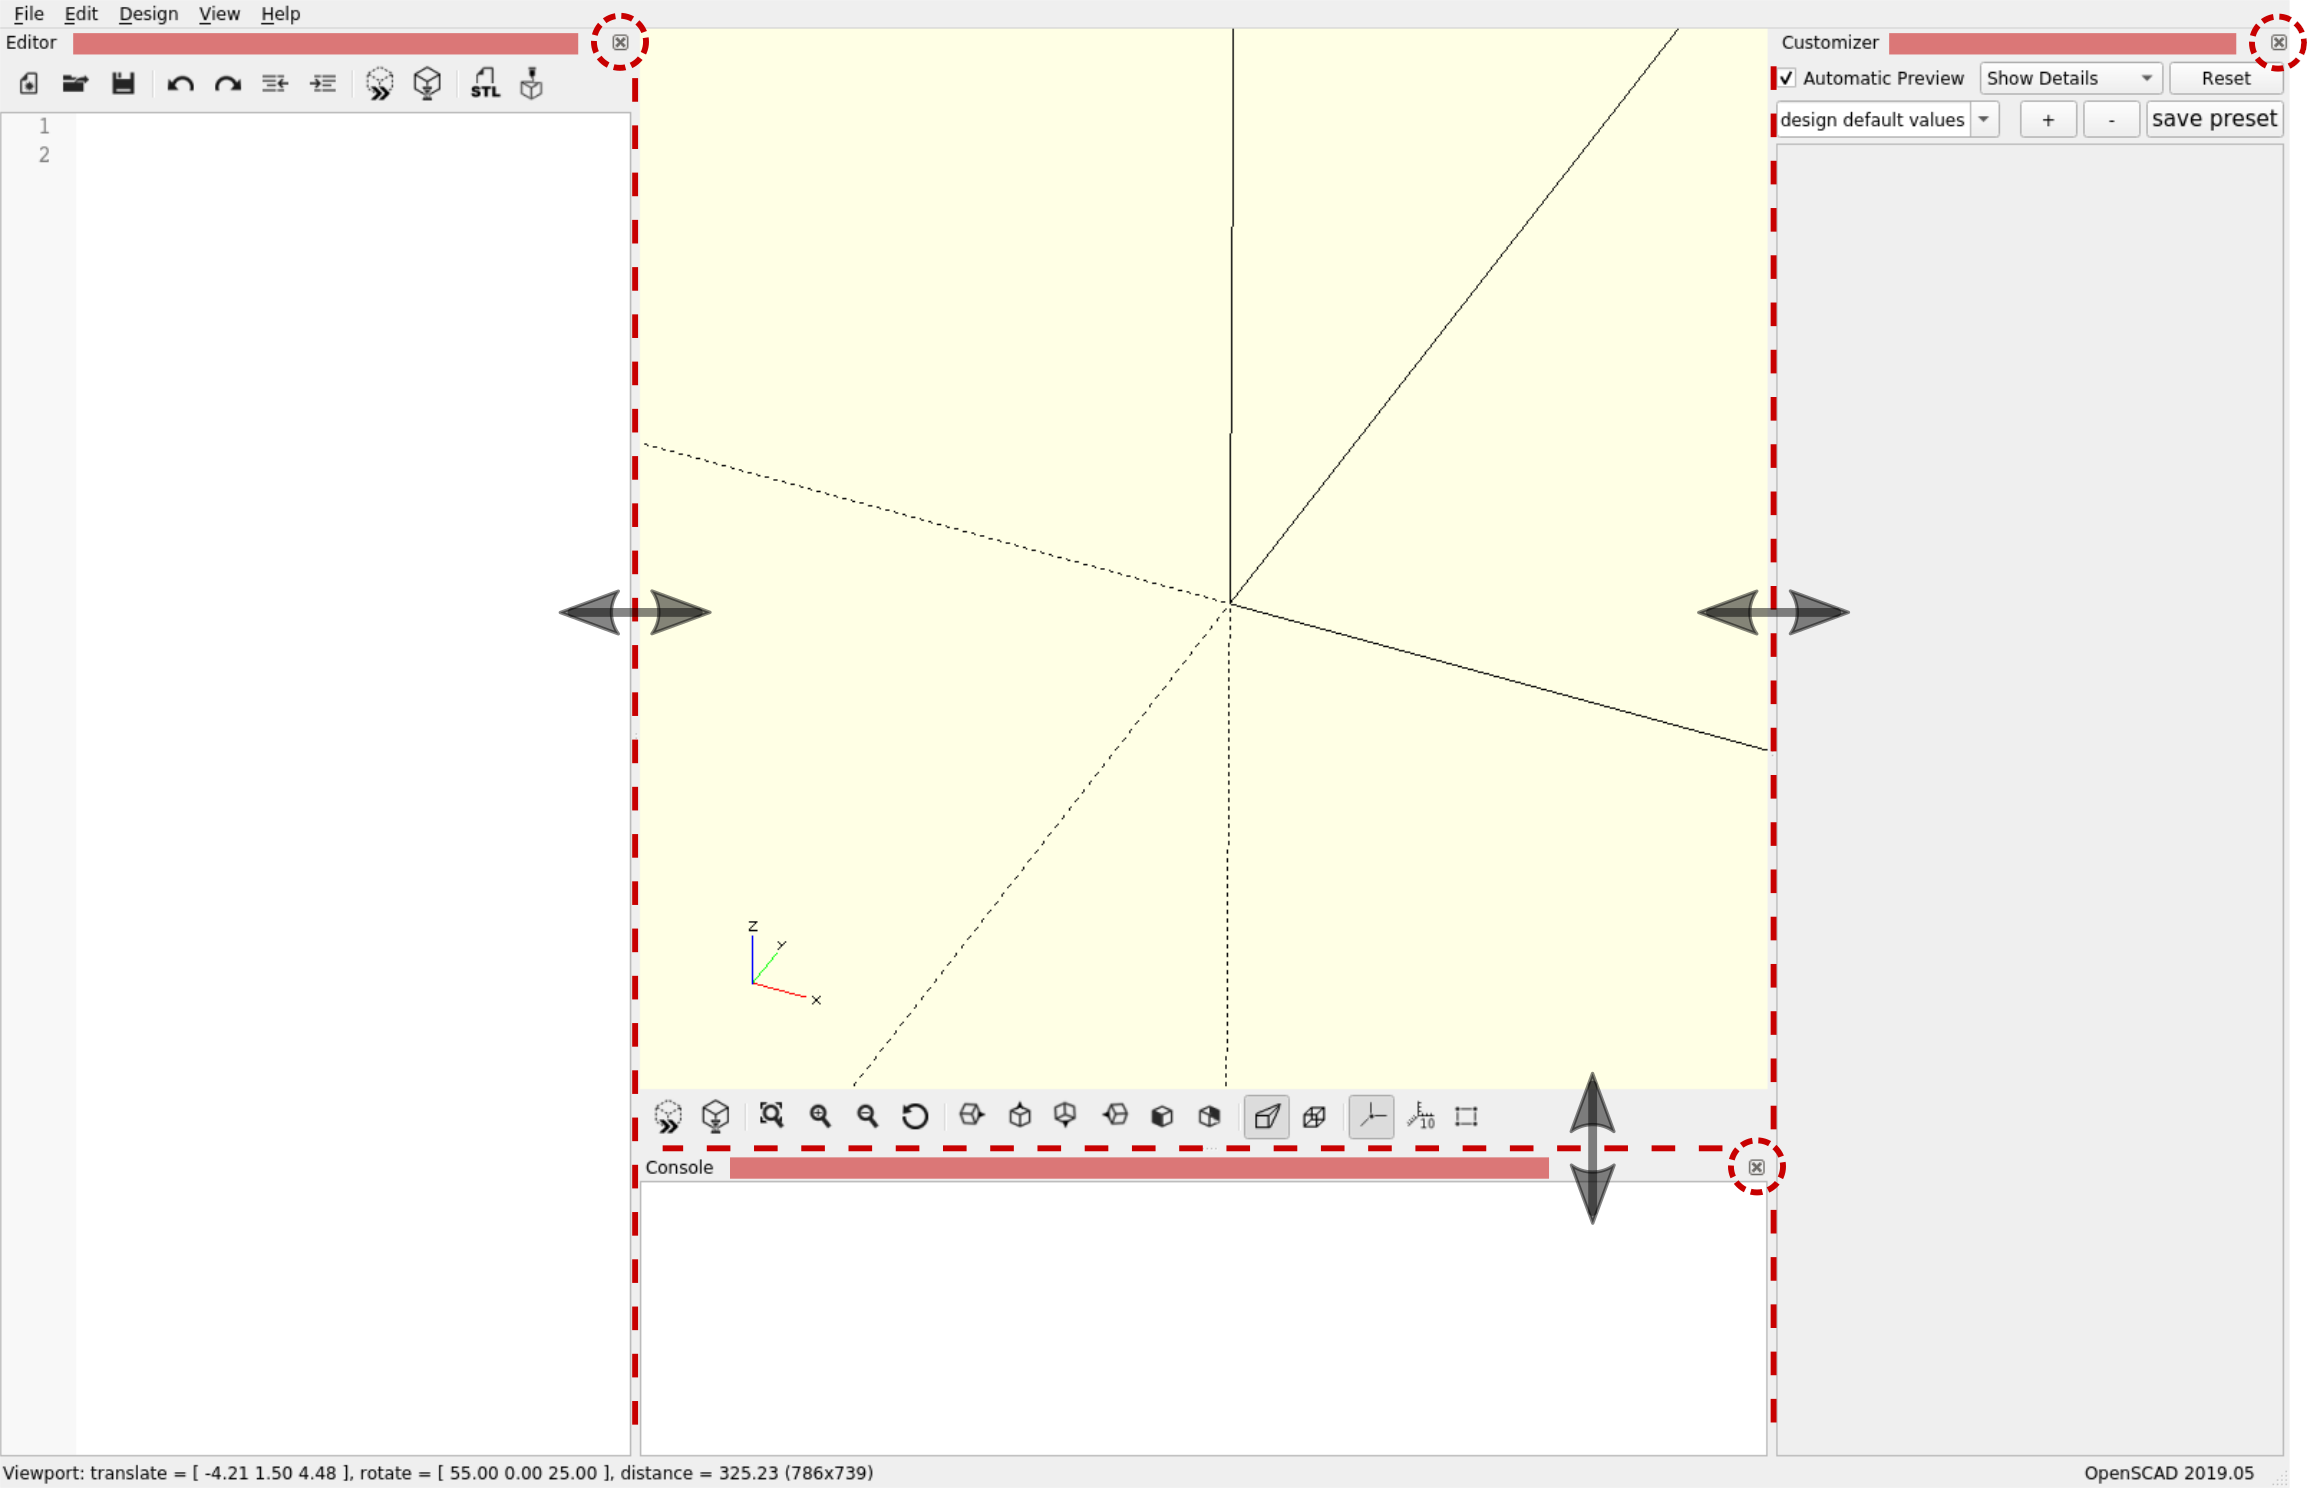
The arrangement of the user interface into these four areas can be adjusted as needed. If you move the mouse to the border between two areas (Figure 1.), you can move this border with the left mouse button held down. If you want to hide an area, you can do this by clicking on the framed small “x” in the upper right corner of the respective area. Alternatively, you can hide and show the individual areas with the menu entries Hide editor, Hide console and Hide Customizer located in the View program menu. If you want to change the relative position of an area within the user interface (e.g. move the text editor to the right side), click with the mouse on the upper part of that area (red shaded regions in figure 1.) and move it with the left mouse button held down.
The program menu of OpenSCAD is quite similar to that of other programs. Therefore, we will only give a short overview at this point and will not go into specific functions until later.
As expected, the File menu contains functions for creating, opening, saving and closing model files. In addition, you have access to a list of recently used files, the export functions and the library directory of OpenSCAD.
The Edit menu provides a range of functions that relate to the text editor area. You can find typical functions like copy, paste or find and replace in this menu. Beyond these text functions you will also find the global settings of OpenSCAD here.
The Design menu contains two core functions of OpenSCAD, which we will use frequently: Preview and Render. The preview function creates a three-dimensional preview of the current geometry as quickly as possible and displays it in the output window. In most cases the result of this fast preview is without visible errors and supports the work immensely. However, the geometry created this way cannot be exported. For this, the second function, render, must be called. Rendering a complex geometry can take quite a while. Therefore, one usually only calls render if one wants to export the geometry or if the quick preview shows visible errors. Besides these two central functions, the checkbox Automatic Reload and Preview can also be found in the Design menu. If this feature is enabled, OpenSCAD observes the current geometry file. If the file has changed it is automatically reloaded and a quick preview is triggered. This feature turns out to be extremely handy during regular workflow: After making a change to the current geometry description in the text editor, it is common to save this change with the shortkey ‘CTRL + S’. As soon as you do this, the output window is automatically updated and you can immediately examine the results of the change. Without this automatic update, you would have to manually trigger a preview after each change. The Automatic Reload and Preview feature also allows you to use an external text editor instead of the internal one while still utilizing the output window of OpenSCAD in parallel.
The View menu has already been mentioned in the previous section. It offers numerous functions with which you can influence and configure the output window.
The last menu, Help, refers to various online resources that can support you in the use of OpenSCAD. Particularly noteworthy is the entry Cheat Sheet. It provides a very handy summary of all OpenSCAD commands and functions. Another very useful item is Font List. It provides an overview of the fonts available in OpenSCAD.
Since you operate OpenSCAD to a large extent with a keyboard rather than a mouse, it is worthwhile to learn the shortkeys of frequently used functions. You can find the shortkey of a function on the right side of the function’s menu entry. Some of the functions are also accessible through icons on the program surface. If you hover the mouse pointer for a short moment over such an icon, a small explanation as well as the associated shortkey of the respective function will be shown.